Caring for Purple Martins
Managing a Purple Martin Colony in Alberta
There are a number things that a landlord should do to keep a healthy and happy Purple Martin colony going.
First of all is Sparrow and Starling control. As I mention on the S&S control pages, it is so important to keep your housing 100% free of these two species of birds. You must have 0 tolerance if you want your colony to thrive. Just tearing out the Sparrow nests is not good enough, as the English House Sparrow will take revenge by entering a Martins nest in another compartment, and destroy it. They then rebuild their own nest over the Martins nest. When I remove a Sparrow nest I always place an insert trap into the compartment and place part of the nest with the eggs in the trap. You will get them every time if you do this. If you remove the nest totally, they usually won't enter the insert trap.
Many people get tired of fighting the Sparrows so they will plug off all the unoccupied compartments in the house. This is not a good idea, as the young bachelor sub adult males like to use these compartments to roost in at night and play in during the day. If you want your colony to grow, you must leave at least a few unoccupied compartments open all through the nesting season. If the Sparrows are driving you nuts, I recommend using 3 or 4 insert traps in the empty compartments until you trap them all.
Secondly, whether you are just starting a new colony, or have an existing colony, use the McEwen crescent shaped Starling Resistant Entrance Holes (SREH) on your housing. A few of the old time landlords may try and tell you that the Martins won't enter them. This information is totally false, and anyone that tells you this has never given the SREH a try. I have been using them for a number of years now at my colony sites, they work perfectly for controlling the Starlings and the Martins not only enter them, but when given a choice, they prefer them to the old round entrances. The females know that they are safe from the Starlings, so they use them. They are also safe from Hawks, Magpies and Owls, as they are unable to reach into the compartment and pull out the Martins as they did with the old round entrances.
I have started many new colonies using total SREH, the Martins have adapted to them so easily. Far more easily than many landlords have. The SREH are used a lot in the USA, so our northern martins use them on the migration up each spring, as they will roost in Martin houses all along their migration if bad weather occurs. So if you have any doubt, come for a drive with me some day, and I will prove to you how successful these entrances are.
Third, is to do regular 5 day nest checks. The Martins do not mind you lowering the house and checking the nests. They may get a bit upset at first, but they soon learn that you mean no harm and settle down, you can handle the eggs or nestlings if need be as well, they will not abandon them. It is best to do the nest checks in late afternoon or early evening. Do them when you get home from work, Martins are very active around the houses in the morning, so I like to leave them alone and just enjoy them in the mornings. Also it is not recommended to do nest checks during cold weather as the Martins are usually huddled inside to conserve energy. So I always wait for a warmer day if possible. If you do regular nest checks, you will know exactly what is going on inside the house, and you will know right away if there is a problem of any kind. You will raise far more healthy nestlings by doing regular nest checks.
Parasites
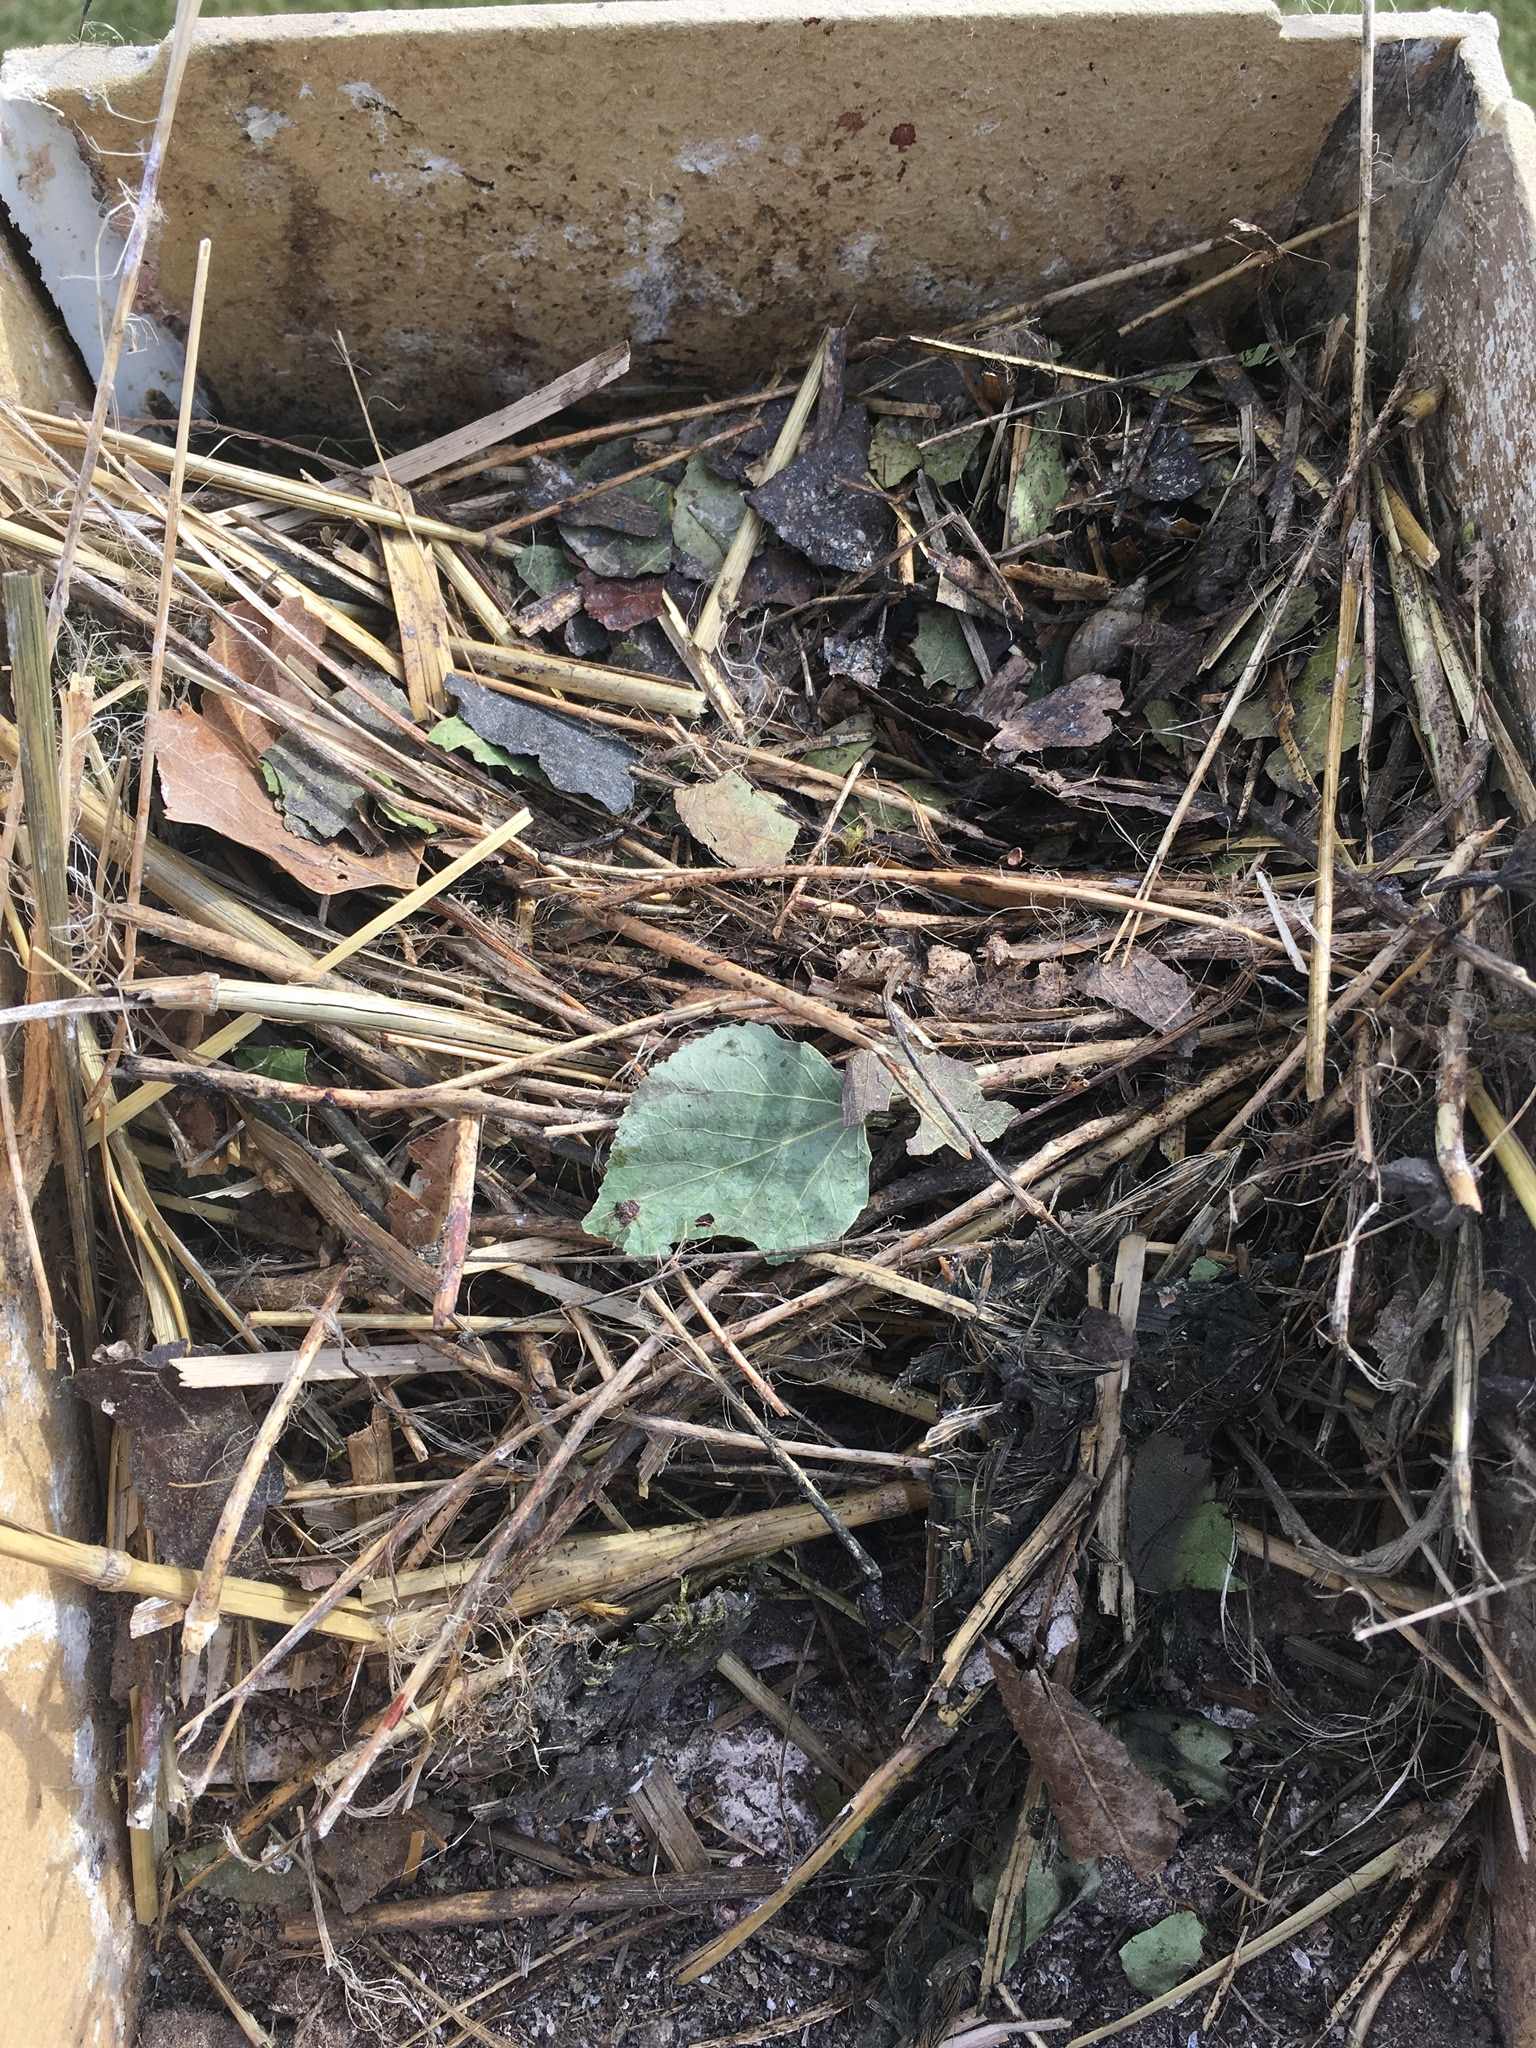

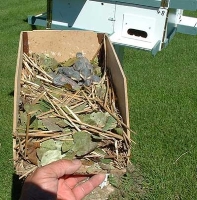
Always look for nest parasites when doing your nest checks. Mites and blow fly larvae seem to be much worse in hot and/or humid weather. Once the Martin nestlings hatch, adult blow flies often will enter the nest compartment and lay their eggs in the nest material. In just a few days the eggs hatch and turn into larvae (maggots). Blow fly larvae are a grey coloured maggot found in the nest material and sometimes attached to the nestlings. During the night is when they like to attach them selves to the nestlings, sucking blood for nourishment to grow into adult blow flies. If the numbers of larvae (maggots) are high, they will cause severe stress to the nestlings and they can kill them. You should check for blow fly larvae when the nestlings are about 7 days old and again every 5 days or so after. It is important to remember that blow fly eggs can hatch and grow to the larvae stag in just 2 or 3 days. Most times you must dig deep in the nest under the nestlings to find the larvae, the first sign I look for is when the green leaves start to turn a dark rotten colour, dig under the leaves with a pencil and you will find them. As I stated earlier blow fly larvae seem to be worse in hot weather ( the black fly season) so always check for them.
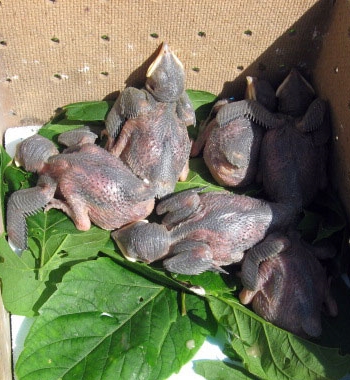
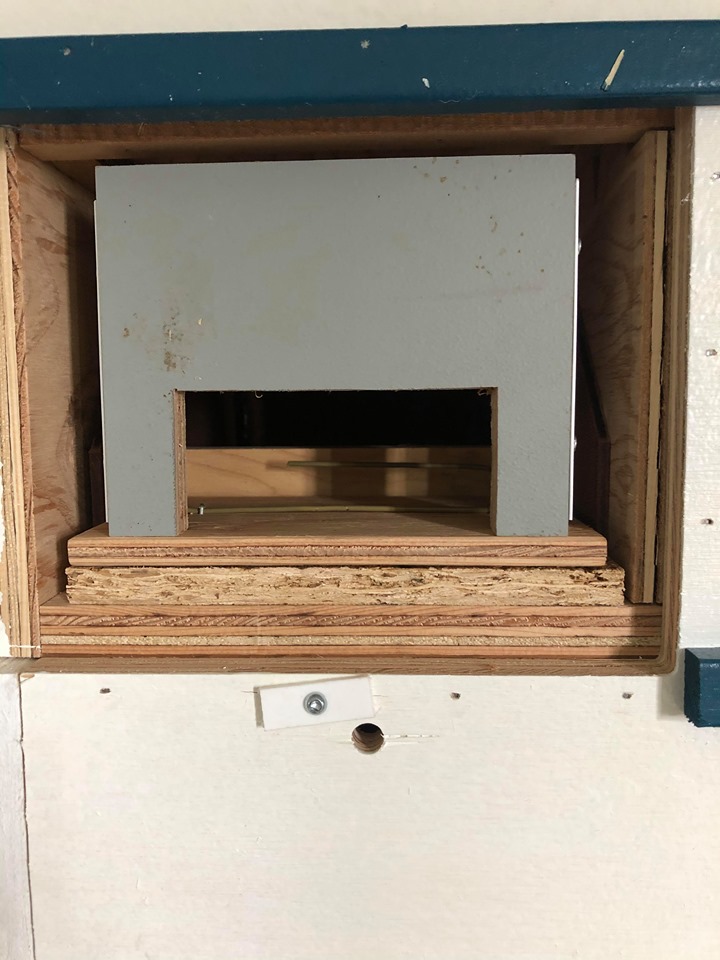
At 12 days old the nestlings are developing their feathers, this is the perfect time to do a nest change if you haven't already. This is where the slide out nest trays in my housing really shines over other styles of houses. I always have extra clean nest trays on hand with the Styrofoam (blue or pink) sub floors in them. Once the nestlings develop feathers they no longer need nest material to keep warm. The Styrofoam sub floor is nice and warm and supplies good traction for their feet. You can simply remove the nestlings from their old nest, check and remove any blow fly maggots from their bodies, then place them into the new parasite free nest tray with the Styrofoam sub floor. You may want to add a few green leaves as seen in the picture. Your nest change is now complete...... It's just that easy.
If your nest check finds that the blow fly larvae is very bad at a younger age, 7 to 10 days old nestlings (no pin feathers and their eyes are not open) you may be forced to do an early nest change. It is very important to try to duplicate the appearance of the nest, to avoid abandonment. Nest changes under 10 days old can be risky.
If mites are present, believe me you will know it. Your arms will itch like crazy. Martin Mites are a tiny little red coloured bug. You can see them crawling all over the walls of the house and compartment. Simply spray the walls and floor of the compartment (not the nest tray) with SEVEN garden spray (5% Carbaryl) and the mites will die, it doesn't take much. ( I prefer the spray over the powder form of SEVEN..... no dust). Then slide the clean parasite free nest tray with the nestlings into the compartment, and your nest change is complete. The nestlings will again be healthy, happy and ready to grow.
Don't worry....... the parents will resume feeding the nestlings just minutes after you raise the house, they will not abandon them. Just make sure you don't wait too long to do the nest checks and nest changes. Try to do this when the nestlings are 10 to 14 days of age if you can. Nestlings 21 days or older are too old to be handled, they could fledge prematurely if you touch them. You can check on them by opening the front door slowly, they will scramble to the back of the compartment and hide, just don't touch them.
I hope this information helps you to manage your colony site better, it's basically what I do to manage mine and has worked good for me so far.
Supplemental Feeding
Here in Alberta as we all know, the weather can get very cold and rainy during the summer. Many times the first arriving Martins will show up before or during a late spring snow storm. If the weather falls below 10 degrees Celsius or 50 Fahrenheit, there are no bugs available for the Martins to feed on. Especially during July and August when the Parent Martins are feeding hungry nestlings. The demand for a steady supply of bugs is enormous, The cold weather is the greatest killer of Purple Martins in the northern part of their range.
On the August 1st long weekend of 2002 we lost well over 50% of our nestling Martins, when a week of cold 5 to 10 degree C weather settled in. The parents had nothing to feed them.
Then again in the spring of 2003, a late spring snow storm on the 6 of May killed many or most of our older early arriving Martins. Martins can take the cold, but they begin to get weak and starve to death if they don't get fed . Adult Martins can go without eating for 3 days, but by day 4 they start to get very weak and may not have enough energy to fly. The nestlings need food every day to gain weight. As a result the population was way down in the summer of 2003.
We now know that Purple Martins will eat SUPPLEMENTAL FOOD if us Landlords care enough about them to feed them. It was sickening for me to watch those hungry fledgling aged nestlings perish in 2002. I vowed to myself that I would never let them perish like that again.
In the spring of 2003, I was ready for the snow storm. I had about 12 adult Martins back here at my home colony, and another dozen were back at Country Nine as well. I had ordered 10,000 meal worms from Victoria and I fed them all up in just a few days. To my knowledge I did not loose one Martin.
Martins will eat Meal worms, Crickets, Grass Hoppers and even microwave scrambled eggs. They like eating frozen or chilled Crickets, but they can get a bit expensive and not always available. They will eat grass hoppers as well, so if any of you care to go out and catch them using a butterfly net, they are free. It works best I found to just freeze them and thaw them out just before you feed them.
I now feed dried mealworms as they are much easier to purchase and keep for an extended period. They are 50% protein and 25% fat so plenty of nourishment for the youngsters, especially if you mix some scrambled egg with them as I did using live mealworms. You can purchase the dried mealworms at most farm feed stores; including Oystershells. In western Canada try Peavy Mart or Co-op, you can also order them on the internet. I recommend supporting Canadian suppliers.
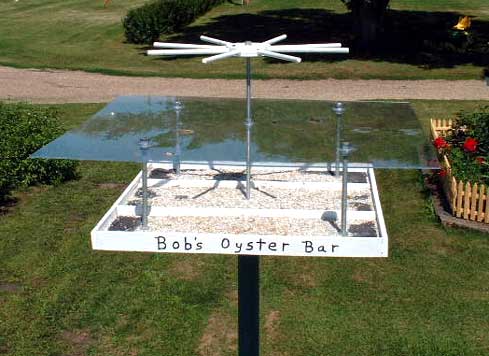
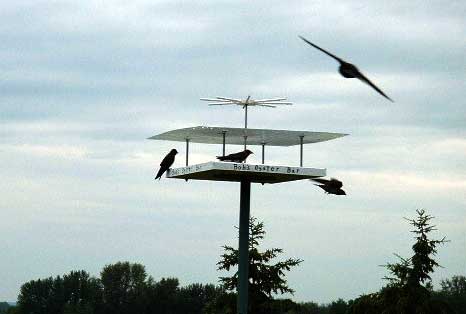
I feed my martins on a raised platform feeder, that I built to supply crushed Oyster shell, egg shell, and now meal worms and microwave scrambled egg. I named this feeder "BOB'S OYSTER BAR" and my Martins love it. It took a bit of training at first to get them use to it, but once they got started they use the "Oyster Bar" every day. They especially like feeding breakfast to their nestlings early in the morning before the bugs are out and just before dark in the evenings. During the day when bugs are plentiful they will ignore the Oyster-bar feeder. (Note for training your birds to use a feeder, it is best to start them with an open platform and no plexi glass roof) once they get use to using it you can add the roof later.
MY MARTINS WILL NOT STARVE AGAIN!
I have found that they will eat microwave scrambled egg as well, but it works best to offer some meal worms with the egg on the Oyster Bar. At first they will pick up the egg, shake it and drop it, but after a few days of supplying fresh scrambled egg with the meal worms they started eating it and then feeding it to their nestlings. What a relief this is to me, I now know I can keep them alive when the weather gets bad. The Oyster Bar is a great source of entertainment in our yard. If the Martins drop any meal worms on the ground the Robins are right there to clean them up. The Oyster Bar attracts all sorts of song birds as well as the Martins.
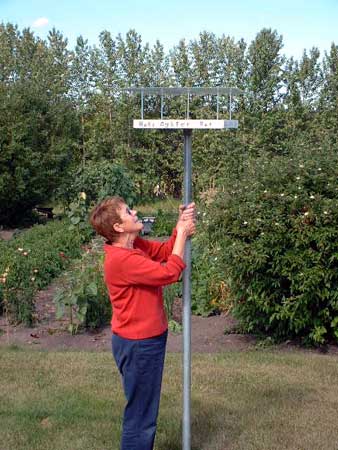
The Oyster bar is built out of sturdy fir plywood with a clear Lexan roof which keeps everything nice and dry. It telescopes up and down using two lengths of conduit pipe, so filling is easy. Once raised, you simply insert a pin into the upper conduit, which holds it at the 9 foot height. If any of you are interested in purchasing an Oyster Bar, I build a few to have on hand here to sell locally, so you can stop in and pick one up. Or I can send them out by Canada Post in a kit form with simple assembly instructions. You just have to purchase two inexpensive 6 foot lengths of conduit from your local electrician and your Oyster bar is ready to go.
NEW ROBIN PROOF OYSTER BAR
After successfully feeding meal worms and scrambled egg for several seasons the resident Robins soon found those tasty treats as well. I had to do something to keep them from eating every meal worm I put out for the Martins.
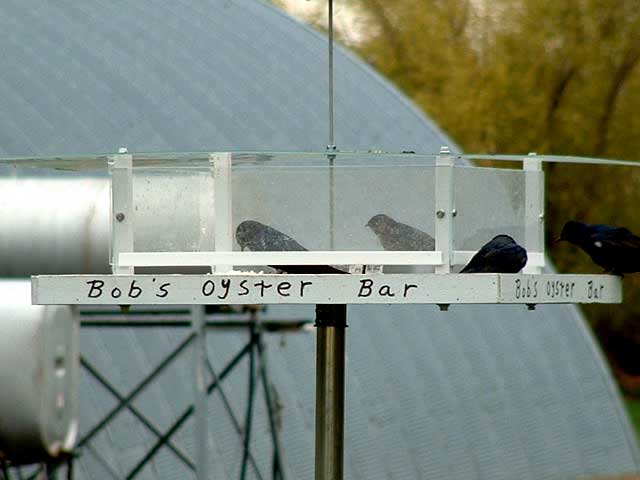

I found that adding sides to my Oyster bar and fastening them 1 1/2" up from the floor solved the Robin problem. The Martins can enter under the sides easily but the Robins are just too big and fat to fit under the plexi glass sides. I made one side so it can easily be removed to clean and fill the Oyster bar. No more Robin problems.
For more info on this conversion please fee free to Contact Me using the information given below or via email at bobbuskas@incentre.net.
Below is a recipe for microwave scrambled egg, give it a try if you like.
Breakfast and late supper are prime times to provide egg during the nestling season. Of course, our nest cams are showing us that this is when parents are under the most stress. Nestlings wake up hungry and are very demanding. They are slow to settle down for the night when their tummies are not full.... every time Mom or Dad moves inside the compartment those little mouths open wide and they screech. Hard for anyone to sleep when the babies are hungry.
Once the parents begin eating the "Egg Mcmeal breakfast", they definitely will feed it to their nestlings as well.
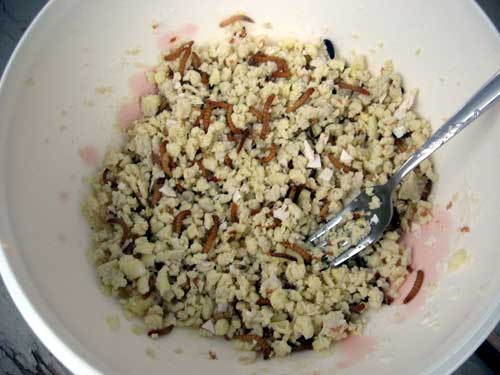
Several of us learned by accident that Martins are "much" more likely to eat fluffy scrambled egg made in a microwave, than dense scrambled egg fried in a pan.
You can make a large quantity of egg in a microwave oven using only a bowl and fork.
Martins seem to relish the moist scrambled egg that the water produces. It also makes for easier clean up as the egg sticks less to the bowl. To get them started eating the scrambled egg, I put in some live meal worms beneath the egg in a plastic cat dish. The cat dish contains the worms and also makes it so easy to discard the egg from my Oyster bar once it gets old and hard.
Break 6 large eggs into a ceramic bowl, add 1/4 cup water, beat vigorously with a fork until yolk, white, and water are very well mixed.
Put bowl in microwave for 45 seconds. remove and stir well with fork, microwave for 45 more seconds, remove and stir with fork..... repeat until eggs are no longer runny. Eggs will be puffed up and fluffy. Don't leave any uncooked egg, but don't over cook.
Using fork, stir eggs while still hot and mash with tines of the fork to break into small pieces. Try to break most of them into 1/4" pieces. Let cool to room temp. Store cooked egg in refrigerator until you want to feed some. It will keep a few days. 6 large eggs will provide 100% calorie requirements for 12 Adult Martins per day.
This recipe can be increased or decreased proportionately.
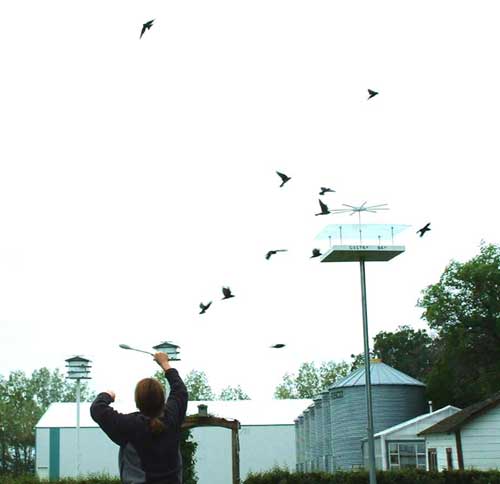
Another feeding method I use is flinging supplemental food in the air to my Martins, using a large plastic or wooden spoon. It works best if you wait until day 3 without food to train them as they must be hungry to learn this method. But believe me, once you get the first one started catching tossed food, the others catch on very quickly. This method can be a lot of fun for you the landlord as well. It usually takes about 20 minutes or so of flinging Crickets or Grass hoppers in front of them, before one will all of a sudden catch on. Just BE PATIENT! Once they learn you will be able to feed them at any time during cool weather. They remember well and soon learn that you are their savior. They will remind you when ever they are hungry during cold weather, believe me! It works best to start them off by tossing Grass hoppers or Crickets, as hoppers are part of their natural diets and they recognize them. Once they are feeding, you can switch to tossing meal worms. I feed up thousands of meal worms this way. I like to stand close to my Oyster Bar feeder when tossing so they get use to a main feeding area in my yard. Feel free to call me at any time for tips on supplemental feeding. I will be very happy to mentor you on this subject. Your Martins will love you for it! Don't worry, when the weather warms up they will once again resume feeding on their own and will not depend on you for food.
ANNE JOHNSON... an experienced Winnipeg Landlord tells her story on feeding Martins in cold weather.
I offer all forms of feeding during inclement weather...crickets on porches (you can put them in the compartment as long as you don't have nesting material in there). It gets covered up otherwise. Putting them on the porches makes them more obvious to the birds.
Meal worms in small containers in which the mealworms cannot climb up and out of, and mealworms, eggs and crickets on a feeding tray close to purple martin house.
When tossing eggs with a plastic tea spoon, you have to be determined, as it can take some time to trigger the old birds memories and also clue in the new ones.
I pretty much toss the microwave scrambled eggs just above the birds heads while they are sitting on their porches or perched on rods. You almost need to hit them with the egg (and I have at times), you need to get so close that they start to open their beaks as it goes by them. This worked for us with a few new birds that were not familiar with supplemental feeding.
Again, the key is to be determined and not give up as it could take you a few days to get them going, but it will pay off in the end. I have 30 birds and every single bird is feeding so don't give up.
Now when my birds are hungry they either fly to my low roof right by my patio doors or as soon as I walk out the doors some birds will start flying towards me. They actually get pretty demanding after a while.
Yesterday morning a male landed on my head (I was wearing a hat thank goodness as they have sharp claws...One nicked me while feeding a few days ago...) As he sat on my head I tossed a piece of egg and he flew off to grab it.
For more feeding info you can call Anne at 204- 477-6970
Thanks Anne, for saving so many Martins from starving!
Starling and Sparrow Control
The most important and possibly the most difficult part of starting a new Martin colony is Starling & Sparrow (S&S) control.
Starlings and House Sparrows are non native birds to North America, so it is legal to kill them. When I was starting my colony here at Northern Sky's there were very few Martins in this area (only one colony within 10 miles of my home). So you can imagine how few Martins I would get each season, to investigate the housing. I had to constantly shoot and trap every Sparrow and Starling that found the house. But after a while, I got a system going that worked very well for me, and I didn't have to be around all the time constantly watching.
Starling Control
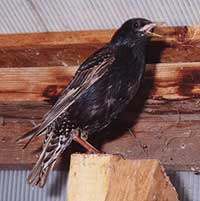
When I built my first house with large 11 inch deep compartments, I soon found that the Starlings loved the large deep compartments just as much as the Martins did. (European Starlings can easily be identified with their long pointed yellow beaks. Adult male Martins have shorter black colored beaks). European Starlings as their name suggests are non native to North America and are considered a pest so it is perfectly legal to trap, shoot or kill this species. These Needle Beaks, are one of the Martins worst enemies, they will kill a Martin in seconds if they get in a fight with them inside the compartment. But after hearing about a great invention by Charles McEwen, 1992 PMCA LANDLORD OF THE YEAR, from Moncton, New Brunswick , I thought I would give the Crescent Shaped Starling Resistant Entrance Hole (SREH) a try.
I started off by offering just a few crescent SREH the first year leaving the majority of the compartments with the round entrances. On the very first day of their spring arrival, I was amazed to see the old Adult Males and females entering these Crescent shaped entrance holes with ease. The females were the first to enter, and of course it didn't take but a minute or so for the males to follow the females in. Nearly all the SREH compartments were chosen by the females that year and they nested successfully. It makes sense that the females felt far more safe inside these compartments, as they new a Starling could not enter them and attack them when they are incubating eggs. Also it is impossible for a Hawk , Owl, Merlin or Crow to be able to reach in far enough through the entrance and pull them or their nestlings out of the compartment, as they sometimes did with the round entrance holes. The young Sub adult (SY) birds arrived later and also excepted them, not to my surprise, as the younger generation always adapt to any new changes more easily.
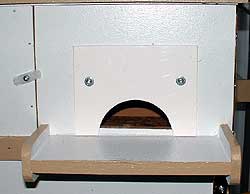
The McEwen crescent shaped SREH must be exactly 1 3/16" or 30mm high and is 3" wide at the bottom. They must be mounted low, 3/8" above the porch floor as the Martins have to crouch down for easy entry. If the SREH is to high off the porch (more than ½" ) the Martins have too much difficulty entering them. I have tested them at different heights off the porch and found 3/8" above the porch works the best, as the Martins enter them with no problem at all, and the entrance is still high enough to keep rain water from running into the compartment from the porch floor. After watching the Martins at active colony sites and also watching them except these entrances so easily at new colony sites, I am totally convinced that I will never build another house with the old round entrances.
I have watched hundreds of Starlings try to enter them and fail, as there long legs and larger bodies make it nearly impossible to enter. I say nearly impossible, because on rare occasions a skinny Starling has been reported to squeeze in, but usually they give up and go somewhere else as they are unable to carry any nest material through the SREH. The McEwen crescent SREH has been tried by many landlords all over North America and has been rated as 95% Starling resistant. All of my houses are now equipped with SREH and my Martins love me for it.
|
|
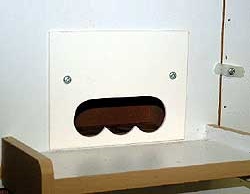
After years of testing all 4 entrances, I now use and sell only 2 of them. The “McEwen Crescent” (90% Starling resistant) invented by Charles McEwen from Moncton New Brunswick, (the first inventor of the SREH) And the “Triple Nickel” (99% Starling resistant). They are made of 1/8 inch puck board and cut to precision with my cnc router. The price is $2.50/ piece mailed to you. So you can choose either, or mix them up, what ever you like. Payment by check, or in Canada etransfer to my email, bobbuskas@incentre.net.
No matter what style of SREH you choose to use, you should always back it up with a Starling trap. Your SREH will not be 100% Starling proof unless you use one of the following Starling traps together with the SREH on your Martin house.
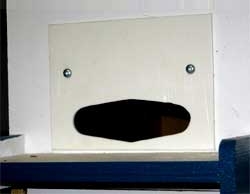
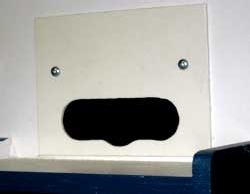
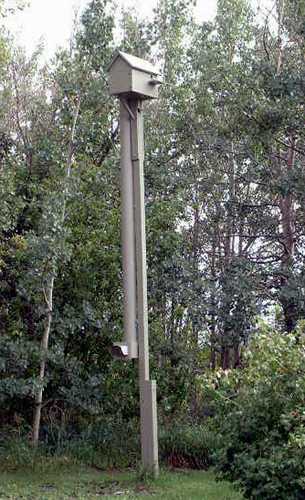
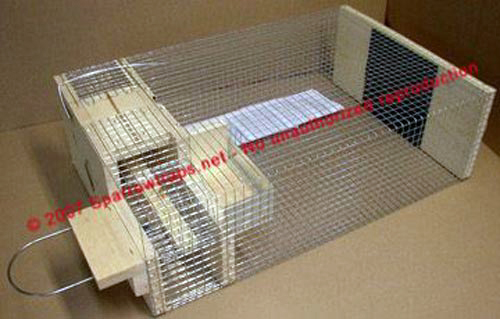
The TROYER S&S CONTROLLER
I built this trap from plans I purchased from the Purple Martin Conservation Association. Or search on the internet for similar traps.
Using the SREH on my housing, the Starling tries to enter one of the compartments and can't, they look around and then head straight for the S&S Controller, set up on the edge of the trees, still equipped with the 2 inch round entrance hole, and in they go. Seconds later they fall down the PVC tube and into a holding cage, just 4 feet off the ground. When I see one in the trap, I simply remove it and destroy it, the trap automatically resets itself....... it's just that easy. You will totally eliminate your Starling problems by using the SREH in your Martin housing and backing them up with a good Starling trap.
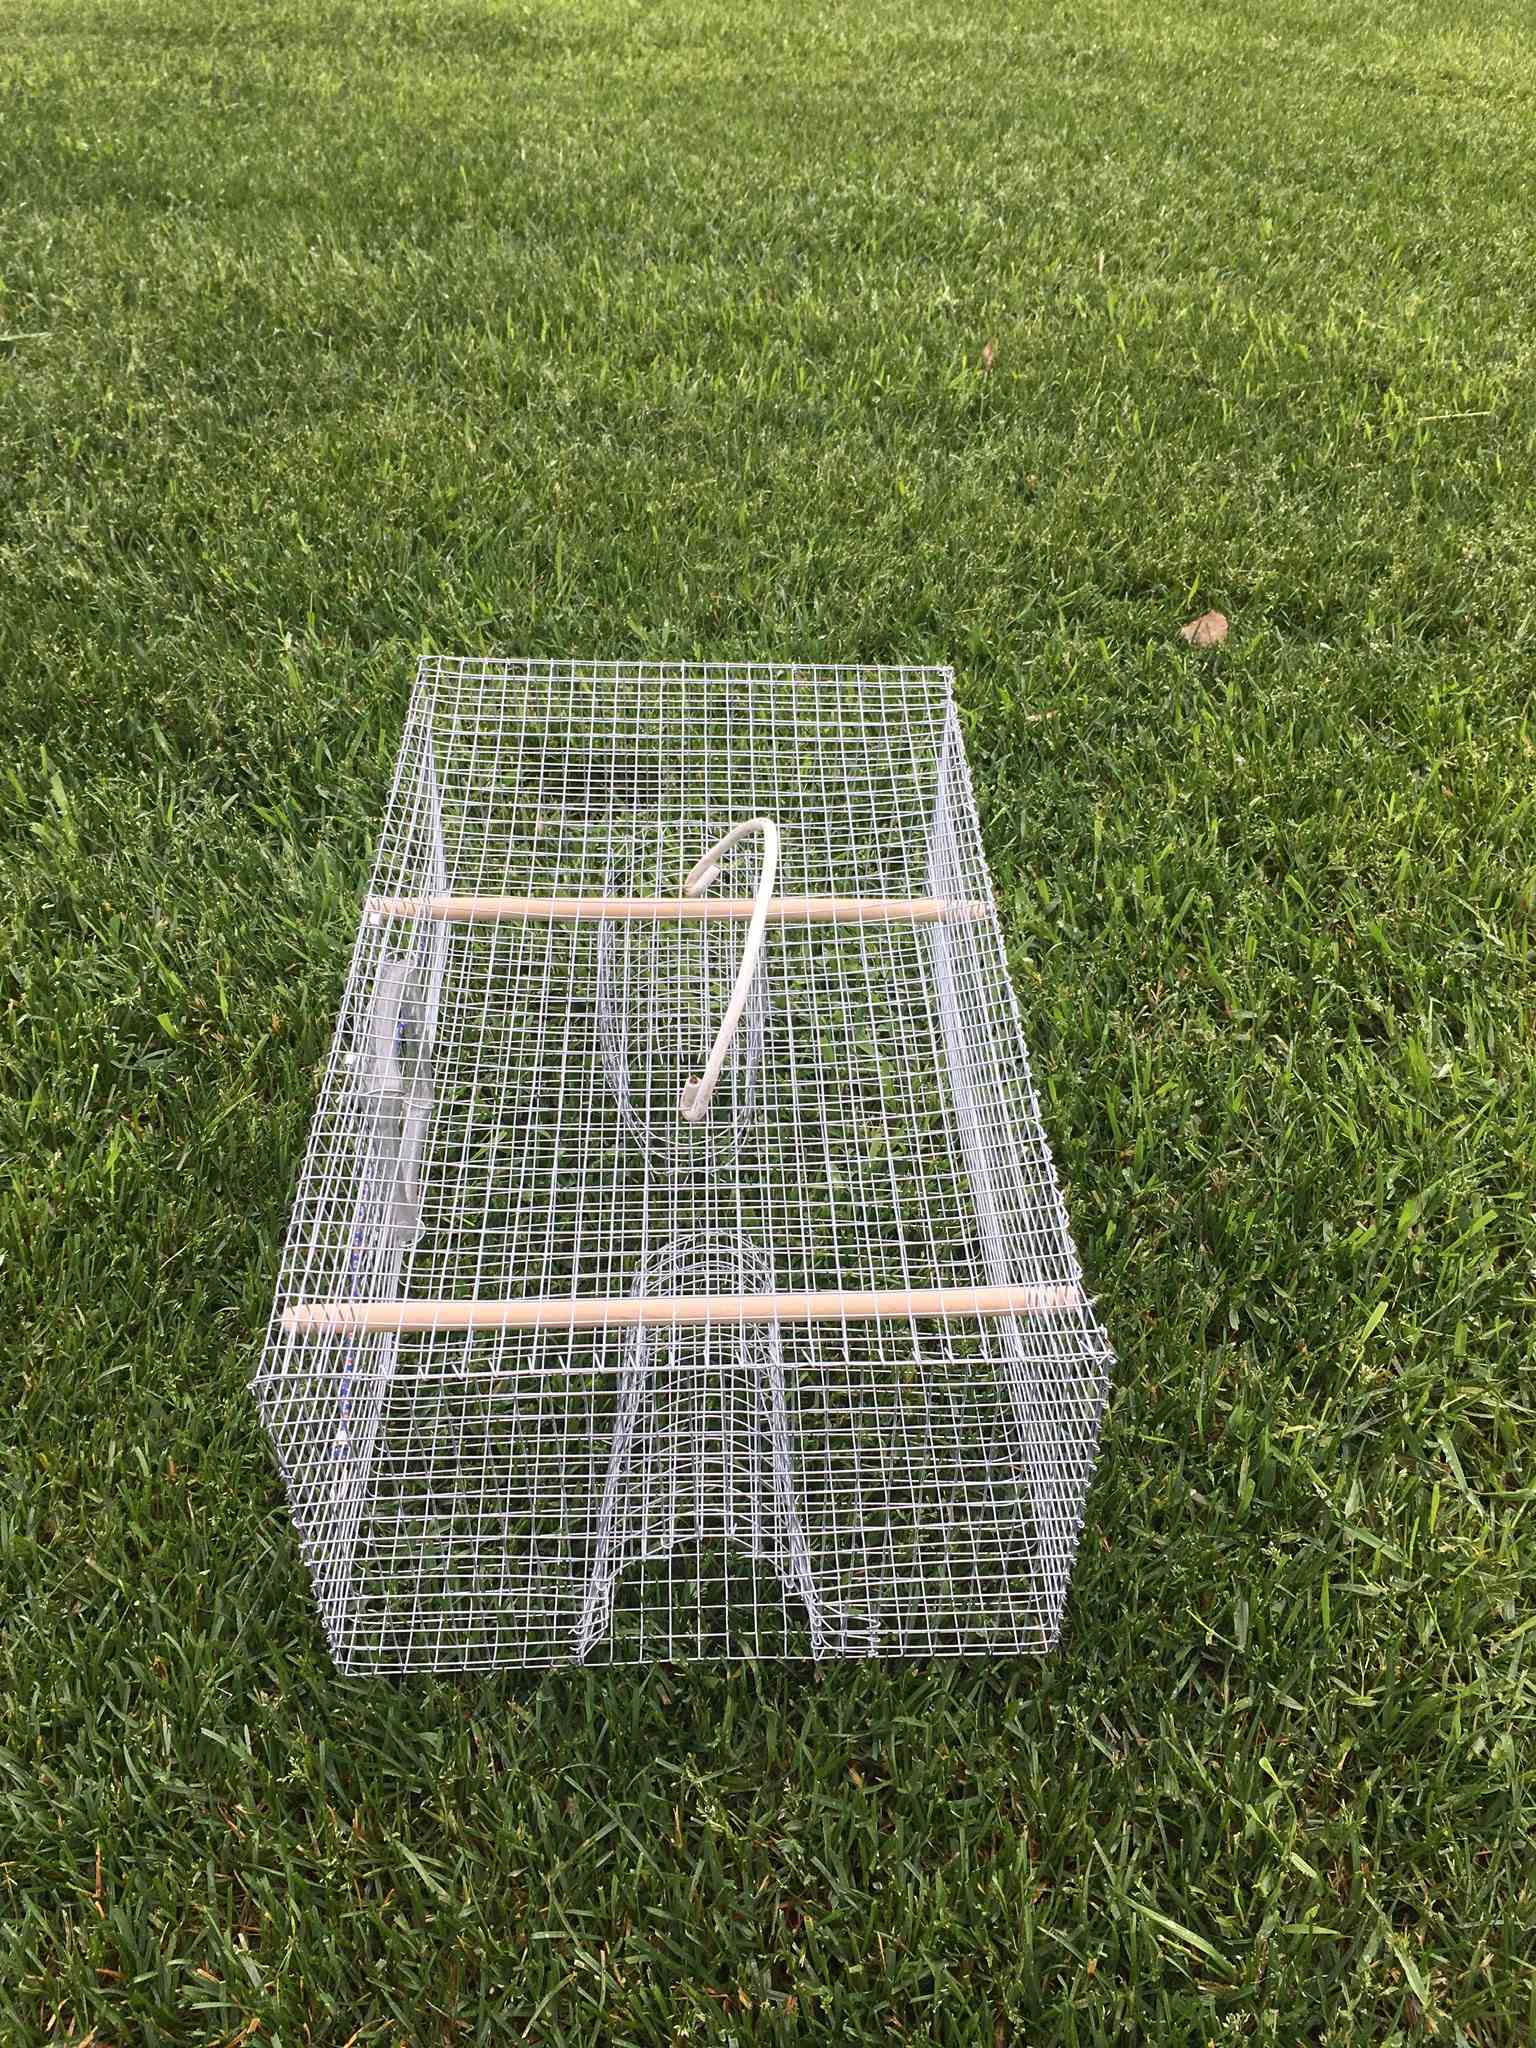
For those of you that want to knock off a few Starlings and don't want to bother with an S&S Controller. I have portable Starling traps available. They also work very well together with the SREH on my houses. Contact me for a price if you wish. This trap works great placed about 8 or 10 feet off the ground close to trees and in sight of your Purple Martin house. You will trap Starlings like crazy with this little Gem. Be certain to monitor it daily, with the 2 inch entrance you may trap the odd Martin. The 2 liter glass pickle jar and a can of (either) starting fluid is all you need to put those Starlings to sleep for good.
House Sparrow Control
The ENGLISH HOUSE SPARROW is the number one reason for the decline in the Purple Martin population in North America. It is also responsible for the decline of other cavity nesting birds, like the Blue Bird as well. The English House Sparrow as it's name suggests is non native to North America. It is considered a pest, so it is perfectly legal to trap, shoot and kill this species. I can not stress enough, how important it is to keep your PM housing 100% free of this nasty bird. Unfortunately, because of their smaller body size, there is no such thing as a Sparrow resistant entrance hole. But just because they are a bit smaller, don't take them lightly, they are very tough and cannot be tolerated at any time in a PM house.
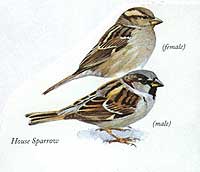
Many people have told me over the years, that they used to have nesting Martins, years ago, but they didn't know what happened. The Sparrows got into the house, started nesting, and the colony slowly disappeared. They were right.... the Male House Sparrow is very territorial. When the parent Purple Martins leave their nest for just a few minutes to go out and feed on bugs, the Male House Sparrow will often enter the Martins' compartment adjacent to his own, and destroy the Martins' eggs by pecking holes in them, or even kill the young Martin nestlings. When the parent Martins return and find their nest destroyed, they give up and abandon the house never to return again. Also the Male House Sparrow has a very powerful beak, and can easily break the leg of a Martin, or any other bird, if they get in a fight inside the compartment.
There are several ways to deal with House Sparrows, the first of course is to shoot them, but this takes time and a lot of practice. Also many people live in urban areas, where shooting is impossible. The second way is to trap them. In the long run this is my choice, it takes much less time, it's safer and very effective.
There are basically 2 types of traps, the bait trap, and the nest box trap
I have found the best way to deal with House Sparrows is to hit them from every angle. In other words, use more than one style of trap as well as shooting if possible. Bait traps can be very affective all year long if placed in the right spot and the area has been prebaited so they get use to feeding before placing the trap. If the bait trap is not catching Sparrows, don't give up.... it's not the trap. Just keep moving it to a new location, sooner or later you will find a location that will work.
I recommend the repeating trap built by Minnesota's Uncle Blaine at sparrowtraps.net. Their traps are among the best and are a great investment.
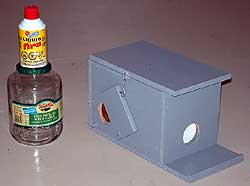
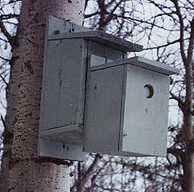
I also have had great success during the nesting season using my Blue Bird or Tree Swallow style nest box trap. If you have several Tree Swallow nest boxes set up around your yard, it will help to take much of the Sparrow and Tree Swallow pressure off the Purple Martin House.
Many times I will notice a Sparrow start to build a nest in these houses, once the nest is near completion, the Sparrow has developed a very strong bond to the nest box. I simply attach my nest box trap to the Tree Swallow house. The trap looks identical to the Tree Swallow house, and has a C hook on the back that hooks into the entrance hole on the Tree Swallow house. Then sit back and wait for several hours, and most often you will have a Sparrow in no time. Hopefully it will be the Male, if you get him your problem is over, if you catch the female, usually the male will just find another mate and re-nest. It is important to get the male, as he is very persistent and will not give up until you get him. They are also very intelligent little buggers, so never leave the trap up in the same spot for more than a couple of days. If you trap him it will usually happen very quickly, within 24 hours. Once you get him, remove the trap.
I found the best method for trapping sparrows is to surprise them. Keep moving the trap from one location to another in your yard, this will persuade the males to check it out, or just remove the trap completely for a few days.
My nest box traps are in and out of the garage many times all summer.
Whenever using any type of trap, you must CHECK THE TRAP REGULARLY (at least twice a day). If you trap a Tree Swallow or any other native bird, you must release them unharmed as soon as possible, as they are protected by law.
You should start trapping Sparrows here in Alberta by late February, the days are getting longer and milder by then. You will be surprised as to how many you will catch this early in the year. And you don't have to worry about catching any other native species, except for maybe the odd Chickadee.
My House Sparrow nest box traps are well built, reasonably priced and work very well. I can mail them out by Canada Post at a fairly reasonable cost. If you would like to purchase one, contact me for a delivered price. Or you can stop in and pick one up here if you like.
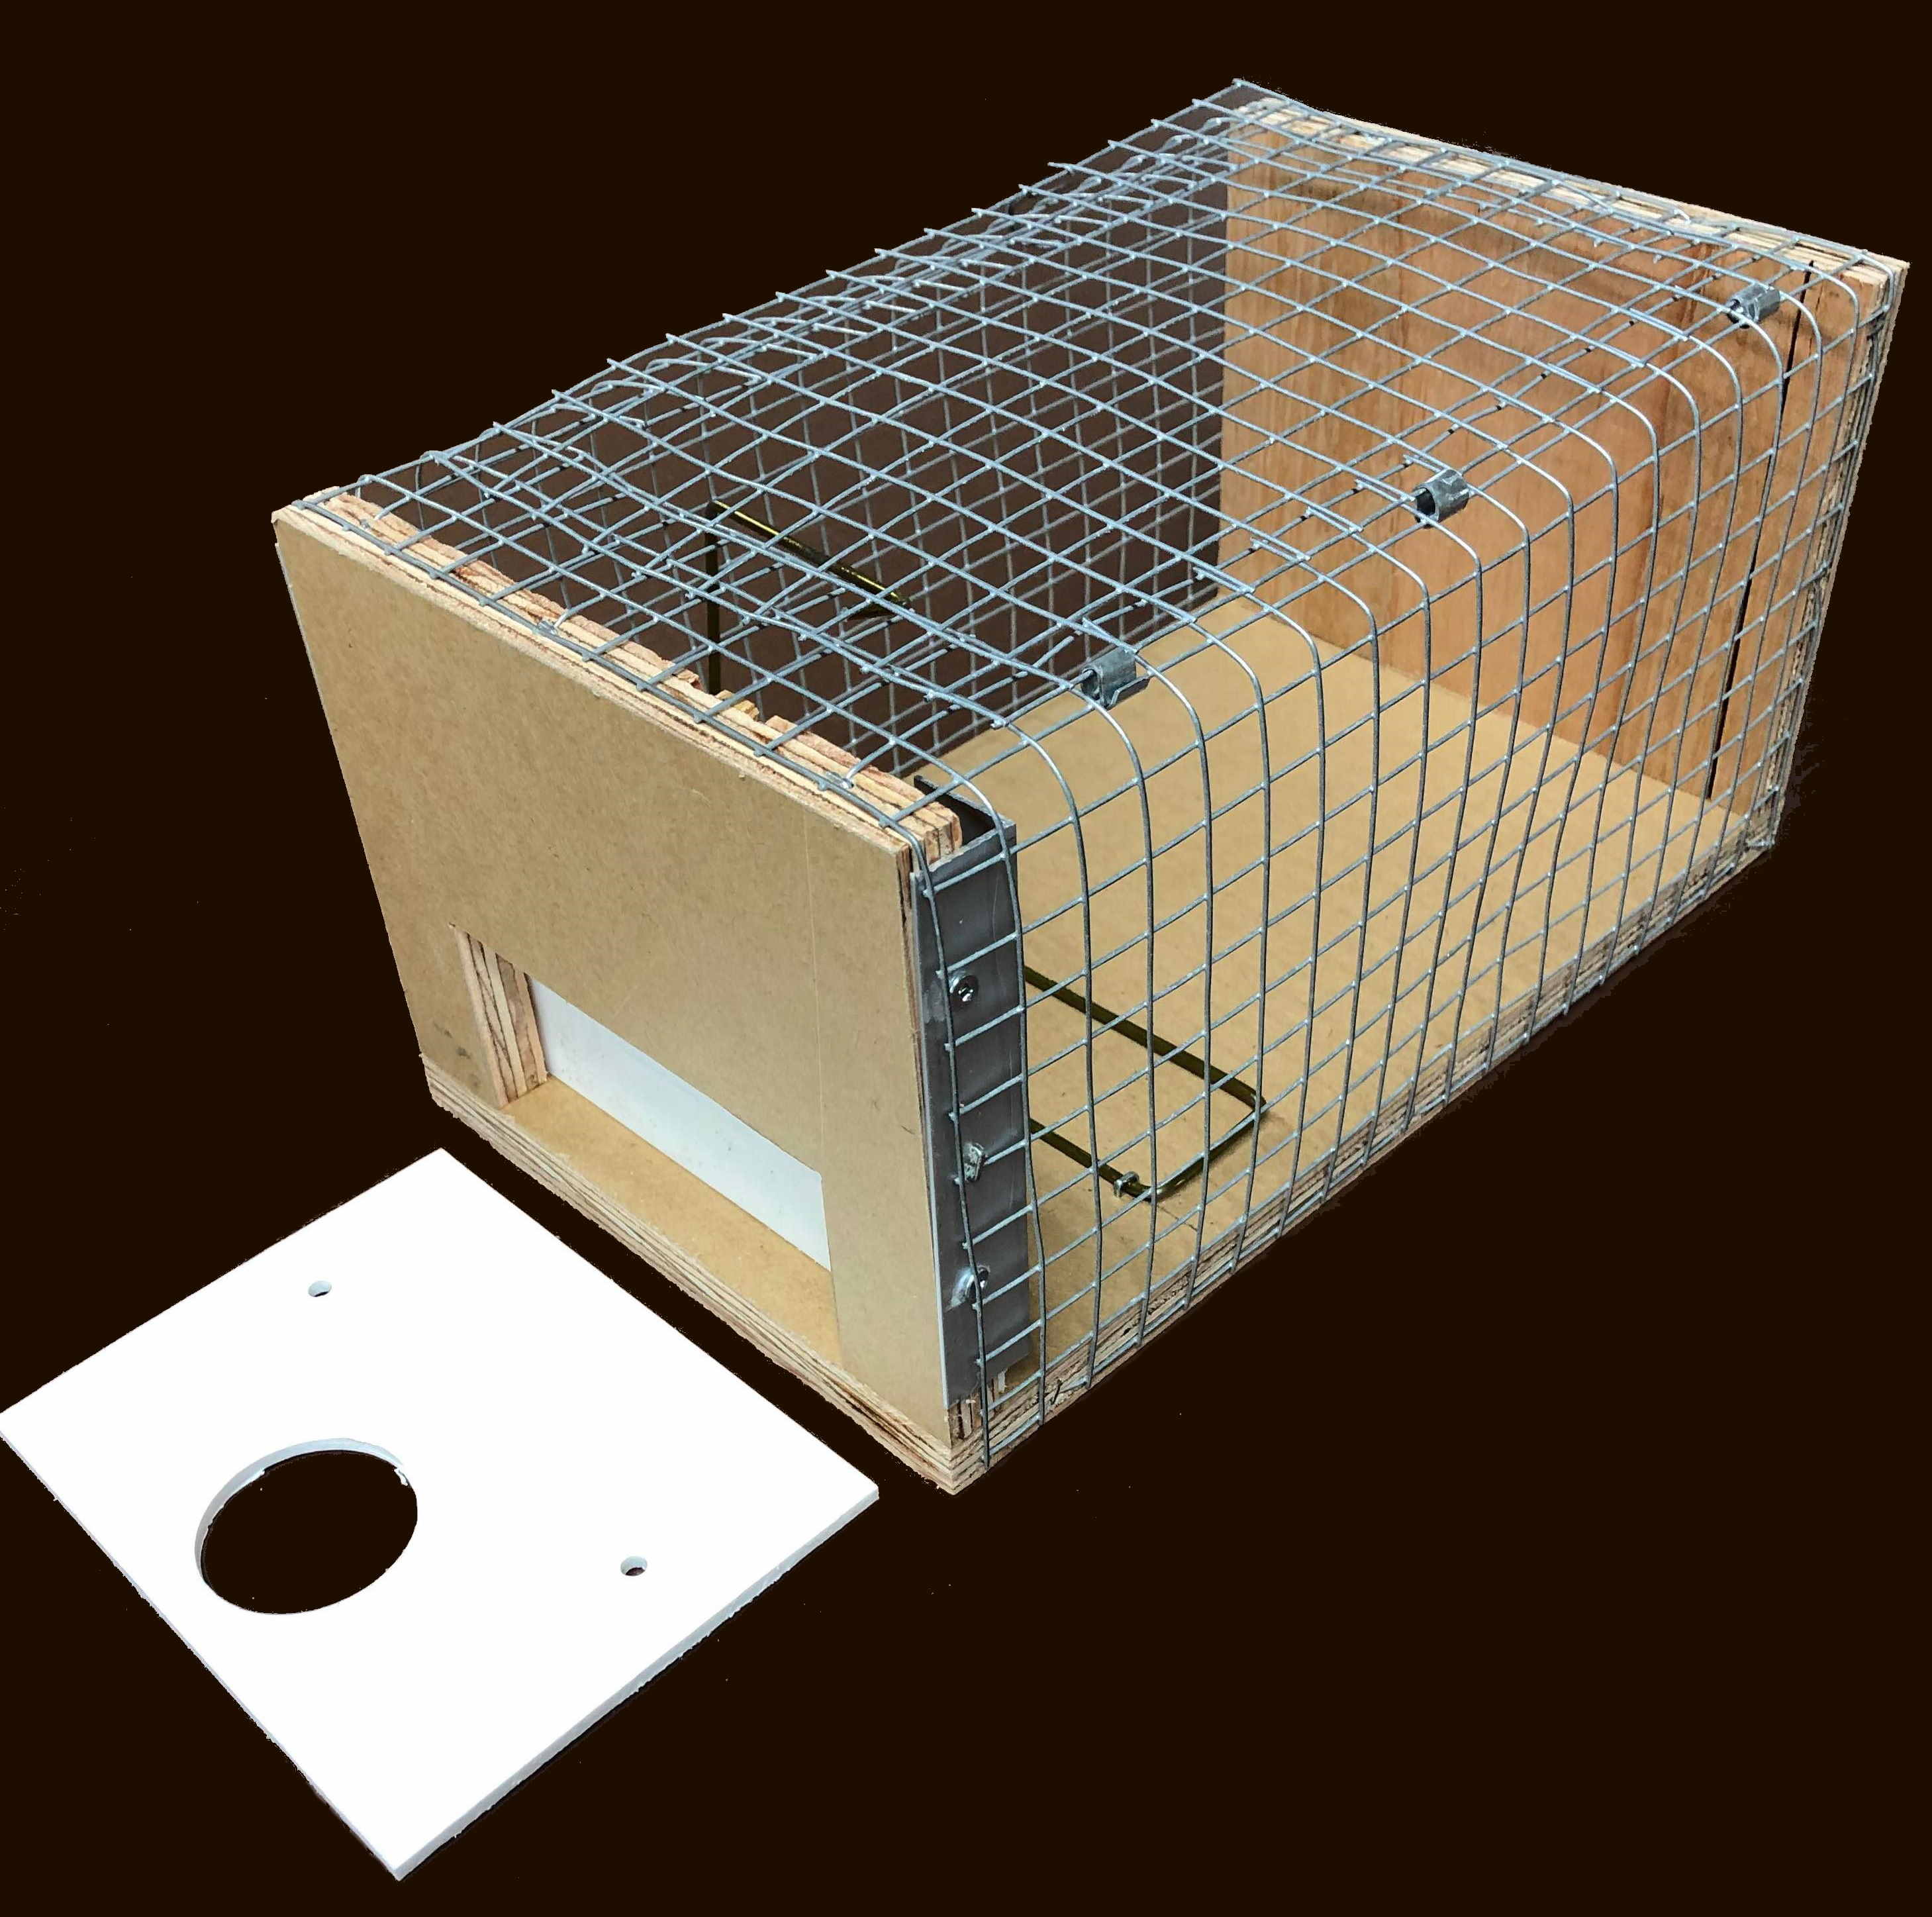
The third trapping method I use during the nesting season is the nest compartment (insert) trap, which fits inside the nest compartment of the Martin house. I make these traps to fit inside my 611 and North Star houses. These trap are very effective, it has a 1 3/8" entrance hole on the front, too small for a Purple Martin to enter. You can leave this trap in the Martin house all season long if you wish. If your Sparrow problem is severe you can use several of these traps in your Martin house at once. I make them here and they are reasonably priced. I can mail them out by Canada Post, so contact me for a delivered price to your area, or better yet, just stop in for a visit some day and pick one or two up.
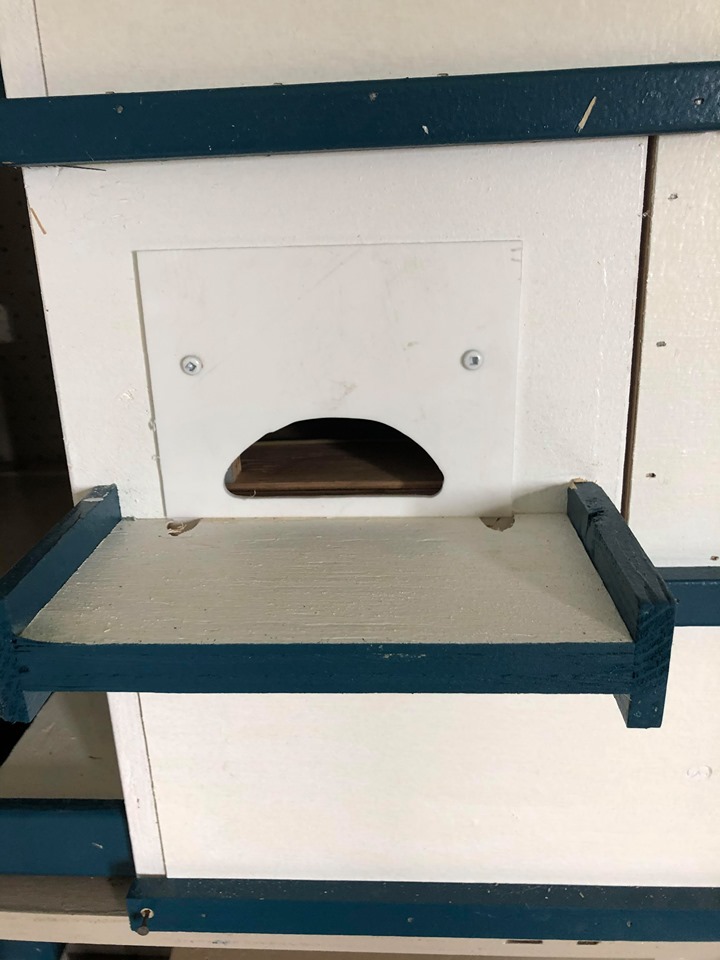
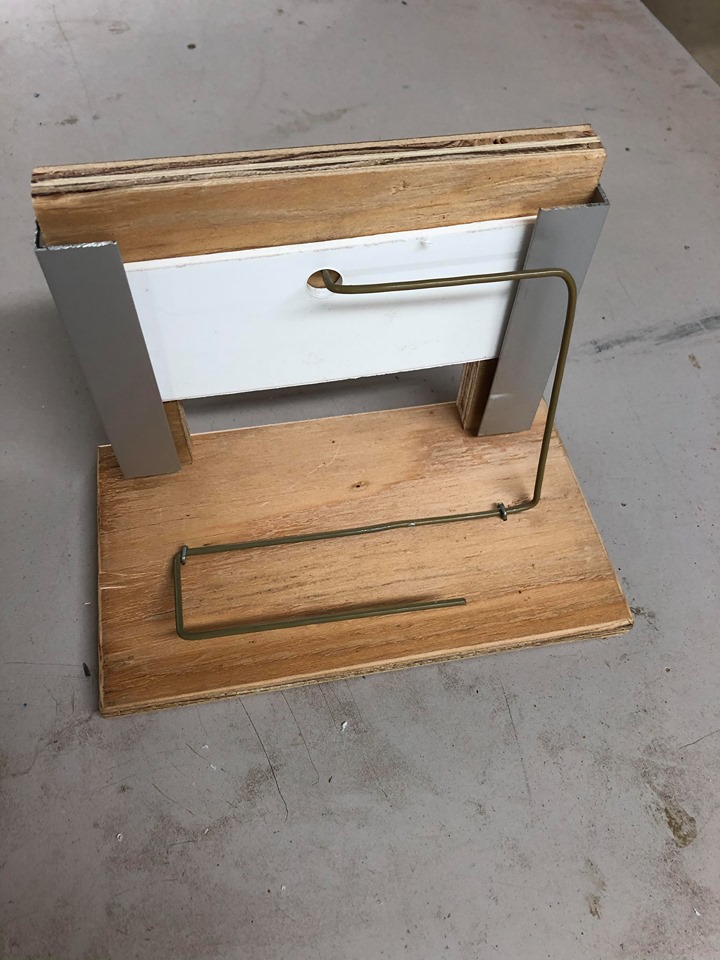
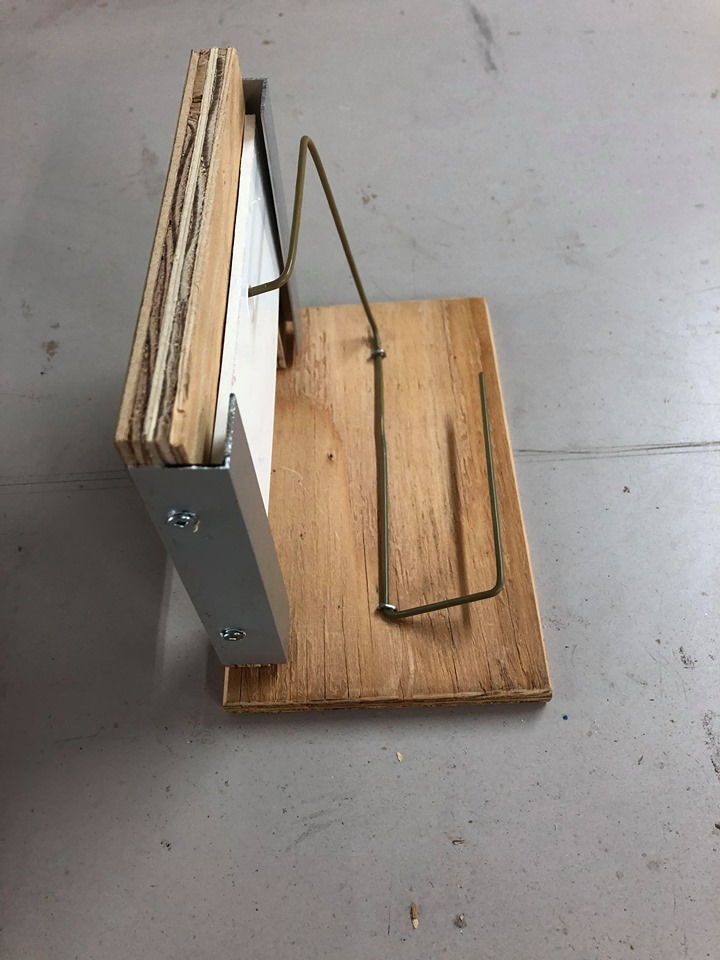
This trap is one I put together myself a few years ago. It isn’t too professional looking, but it sure works good to trap house Sparrows that have already built their nest in the Martin house. The benefit is that you can leave the sparrow nest in place, the Sparrow suspects nothing. All you do is clean out the area in front of the perch on the nest tray, and set the trap in place. Then close the compartment door. The Sparrow goes about his or her normal life not expecting anything when they enter the cavity, and... *BINGO* you got em!
You can make your own bingo trap or contact me, I will keep a few on hand for you to purchase at a reasonable cost. You can pick them up here, or I can send them out by mail, so no problem on delivery.
Tree Swallow Control
Tree Swallows can also be a problem in a Martin house when starting a new Martin colony.
If you allow them to claim a nest compartment first, they will defend their territory, and chase off any newly investigating Purple Martins.
The easiest way to prevent Tree Swallows from claiming your Martin house, is to place several Tree Swallow nest boxes or gourds up within about 30 or 40 feet of the Martin house. The Tree Swallow has a territory of about 50 feet around their nest box. So once they claim one of these nest boxes or gourds, they will leave the Martin house alone, and also will drive any other Tree Swallows away from the area. Tree swallows arrive a few days earlier in the spring than the Martins, so keep the Martin house compartments plugged off when the Tree Swallows first arrive. This forces them to go to the nest boxes instead of the Martin house.
It's kind of like using fire to fight fire, this method works very well, and the benefit is that Tree Swallows are also very nice birds to have nesting in your yard.
I fasten the Tree Swallow boxes to a tree or post, about 6' off the ground, it doesn't take them long to find them. Once the Martins get established, and have claimed their nest compartment in the Martin house, they are much more aggressive towards the Tree Swallow and most times will chase them away, as the Martin is a much larger Swallow.
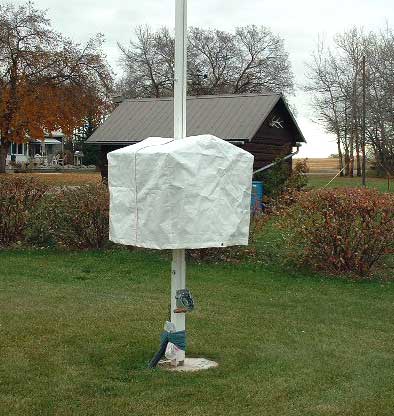
Winterizing
In late August Martins leave Alberta to head south to Brazil. I recommend leaving the housing up until the Labor day holiday weekend. This is a good time to lower your housing down for the winter, and clean it up. Your house maybe crawling with Martin Mites at this time. I like to mix up a batch of 5% Seven garden or (poultry) spray at this time, and give the house a good spray down, I found Seven works excellent for killing the mites and even works right through to the next season. I do not use Seven in the nests when the Martins are present, I wait until I know they are no longer returning to the house in the evenings. But I don't wait too long either, or the mites will start crawling down the pole and will over winter in the ground. The following spring they climb back up the pole and into the house. I like to spray my houses by late August or the Sept 1 Labor day weekend at the latest. It is ok to leave the old nests in the house for the Martins to use next year if the nest is in reasonably good condition. If the nest is in poor shape I like to clean it out good and then replace it with a new nest as seen on the Attracting Martins page on this web site. If you don't want to use Seven, then I recommend cleaning the house out well and wipe it down with rubbing alcohol. Then rebuild all the nests in the spring for them. Never leave your Martin house in the raised position and the entrance holes open over winter. The entrance holes should always be plugged in the fall. I leave all my houses down over winter and I have nice white fitted covers made for them to protect them from the harsh winter weather. I hope this information helps you to manage your colony site better, it's basically what I do to manage mine and has worked good for me so far.